Getting a functional 3D scan of a room with a phone is surprisingly easy today.
Getting one you can actually trust — for measurements, asset documentation, or anything downstream of a CAFM or BIM system — takes a little more thought. The hardware is fine; most failures come from picking the wrong workflow or rushing the capture.
This post covers the three phone-based workflows worth knowing, and the capture habits that separate a usable scan from a warped mesh full of holes. If you haven't yet decidedhow muchdetail your space actually needs, start with thecompanion post on the tiered approachand come back here.
Three workflows, three levels of output
1. Quick site previews
The mesh-producing scanning apps. Point the phone, walk the space, get a textured 3D model on the other end. Great for visual context and walkthroughs, less reliable if you need real-world dimensions to be exact. All the apps in this group take similar effort on-site. What separates them is the capture technology, where the processing runs, and how the app handles drift.
Scaniverse
App:Scaniverse(with LiDAR mode on supported devices)
Device:Android (without LiDAR), or an iPhone/iPad with LiDAR (iPhone 12 Pro and newer, iPad Pro 2020 and newer)
Price:free
Processing:on-device
Best for:simple interiors and passageways where you need spatial layout and adjacency more than photorealistic detail
How it works.Walk through the space at a steady pace. Scaniverse gives you live visual feedback, and in LiDAR mode it shows an AR overlay of what's already been captured, building the geometry in real time. When you stop, the device processes the model almost immediately.
What you get.A dimensionally reasonable mesh with basic texture. File sizes are small, and you can cover an entire floor of corridors in a single walkthrough.
Limitations.Textures are functional but coarse. Small signage and cable labels won't be legible. Rooms with complex multi-level geometry (stairwells are the classic example) tend to accumulate drift and tilt, so treat those outputs as an approximate spatial reference rather than an accurate as-built.
Polycam, KIRI Engine, RealityScan (mobile)
Apps:Polycam,KIRI Engine,RealityScan(mobile)
Device:any recent smartphone for the pure photogrammetry modes. A LiDAR-equipped phone (iPhone Pro or iPad Pro with LiDAR) for the LiDAR room-scan modes in KIRI Engine and Polycam, which need depth data to build room-scale models
Price:Polycam and KIRI Engine each have a free tier with scan and export limits, plus paid subscriptions for unlimited use and advanced features. RealityScan is free for individuals and small businesses
Processing:cloud-based for pure photogrammetry (a few minutes for a room-scale capture). Hybrid on-device plus cloud-enhancement for KIRI's LiDAR room-scan mode
Best for:rooms you want to communicate visually to someone who can't visit them
How it works.You capture a series of overlapping photos (or a guided video) of the space. The photogrammetry engine stitches them into a textured 3D model, either on-device (for the LiDAR-assisted modes) or after uploading to the cloud. Polycam also offers a LiDAR mode that behaves more like Scaniverse and gives live feedback while you scan.
What you get.A textured mesh at room scale. In practice the visual quality sits in similar territory to a Scaniverse scan, because the underlying technology overlaps. Where these apps pull ahead is in specific features (guided AR, floor-plan generation, cloud sharing) rather than a step change in raw output quality.
Limitations.Cloud photogrammetry needs an internet connection for the upload. Geometry can drift on larger captures without LiDAR assistance. A good balance for individual rooms and assets; fidelity drops off once the scene gets big.
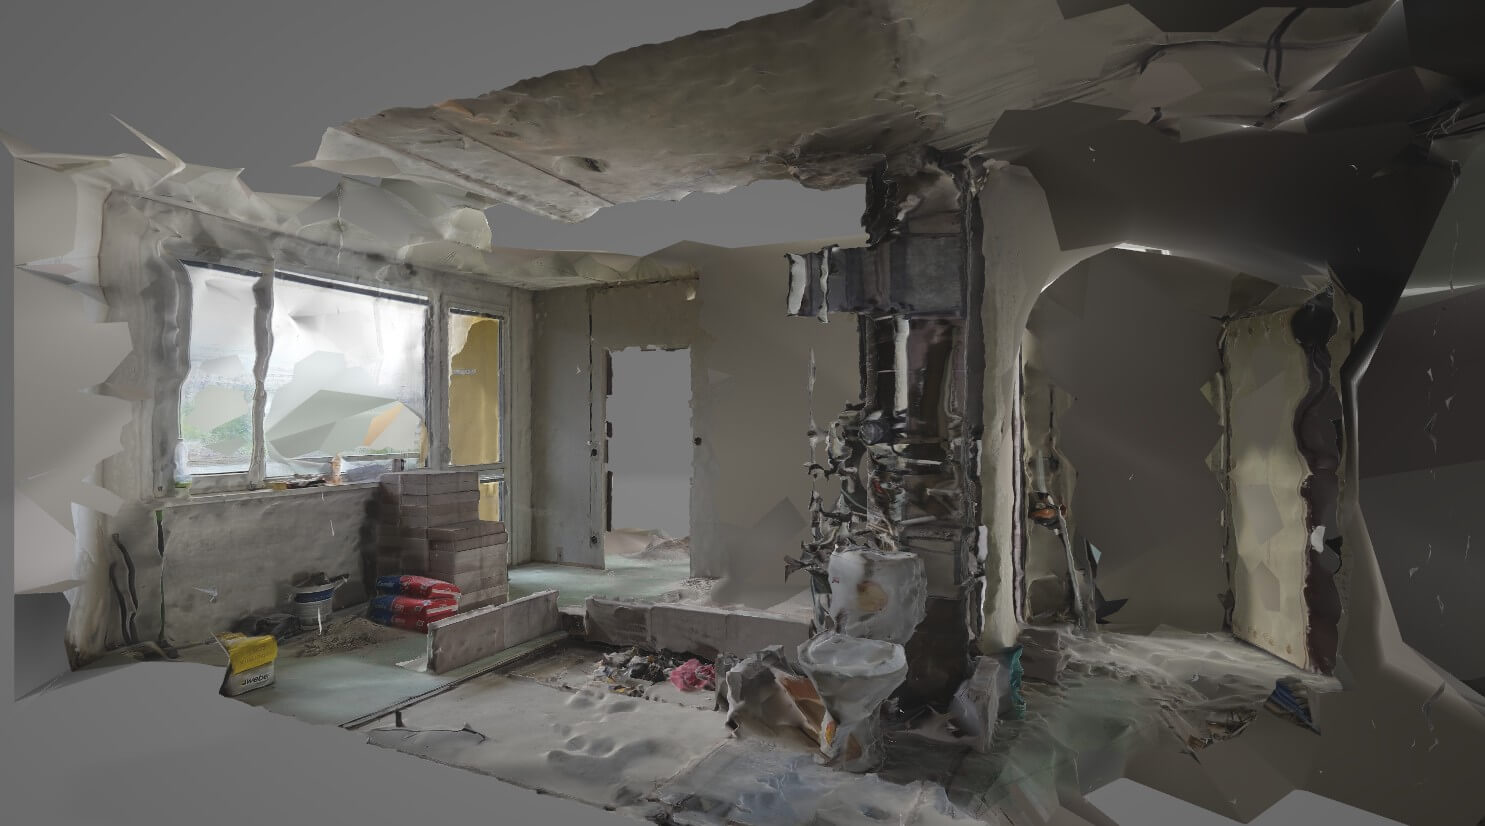
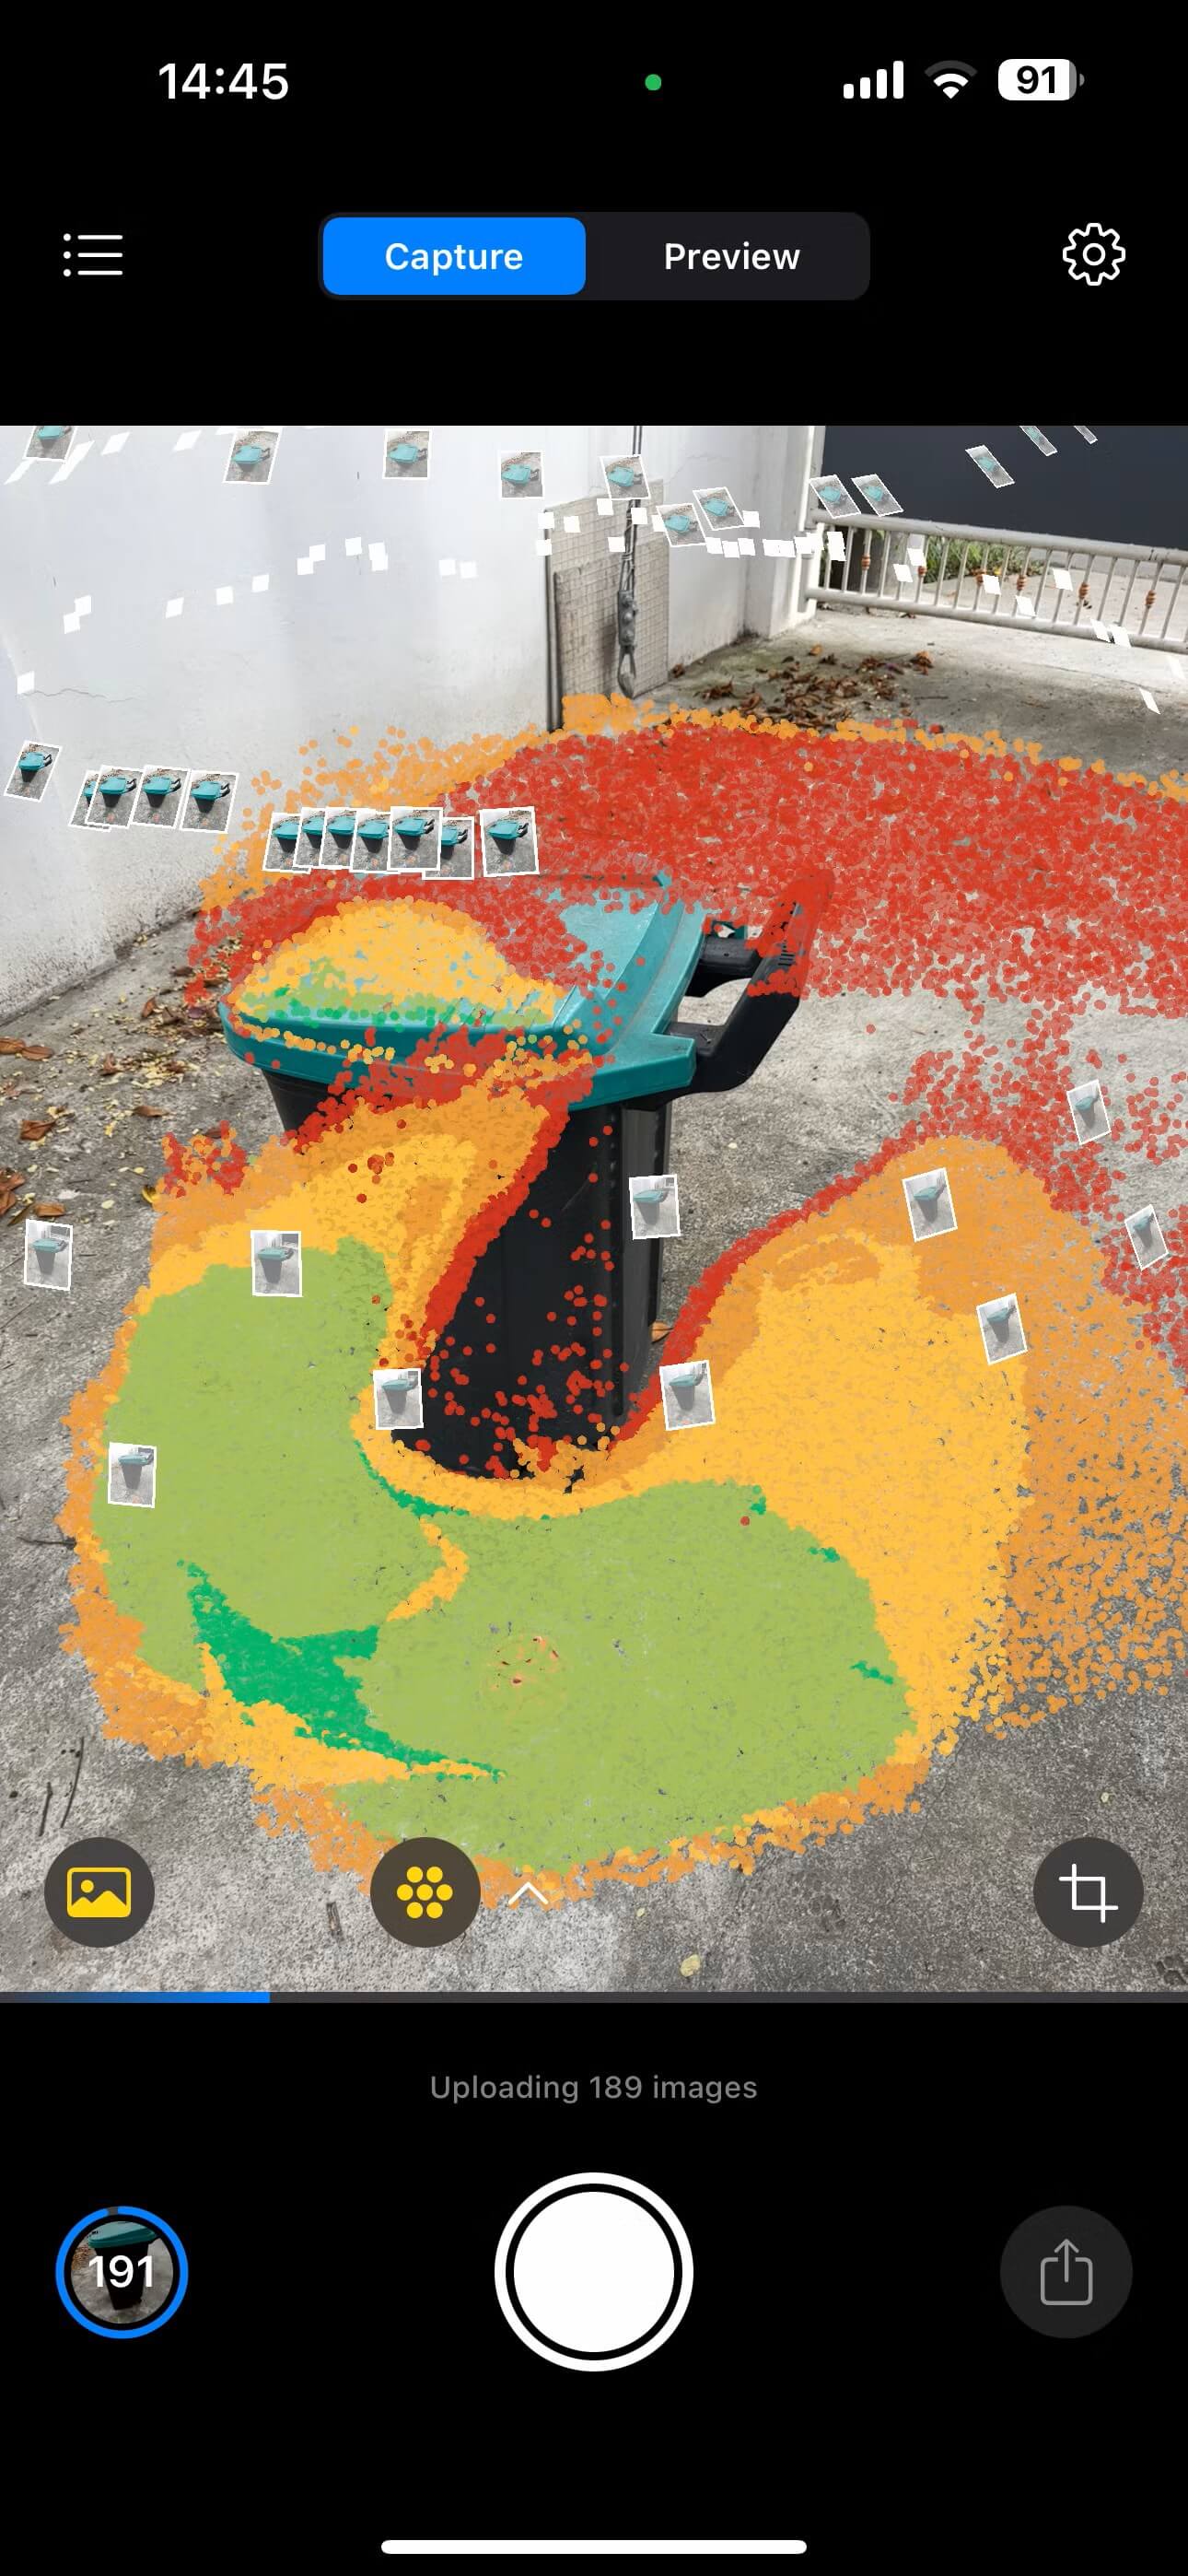
Figure 1: Rough scan of a construction site. It misses a lot of detail, but it is enough to visualise the current state of the site. Source: ioLabs, RealityScan mobile.
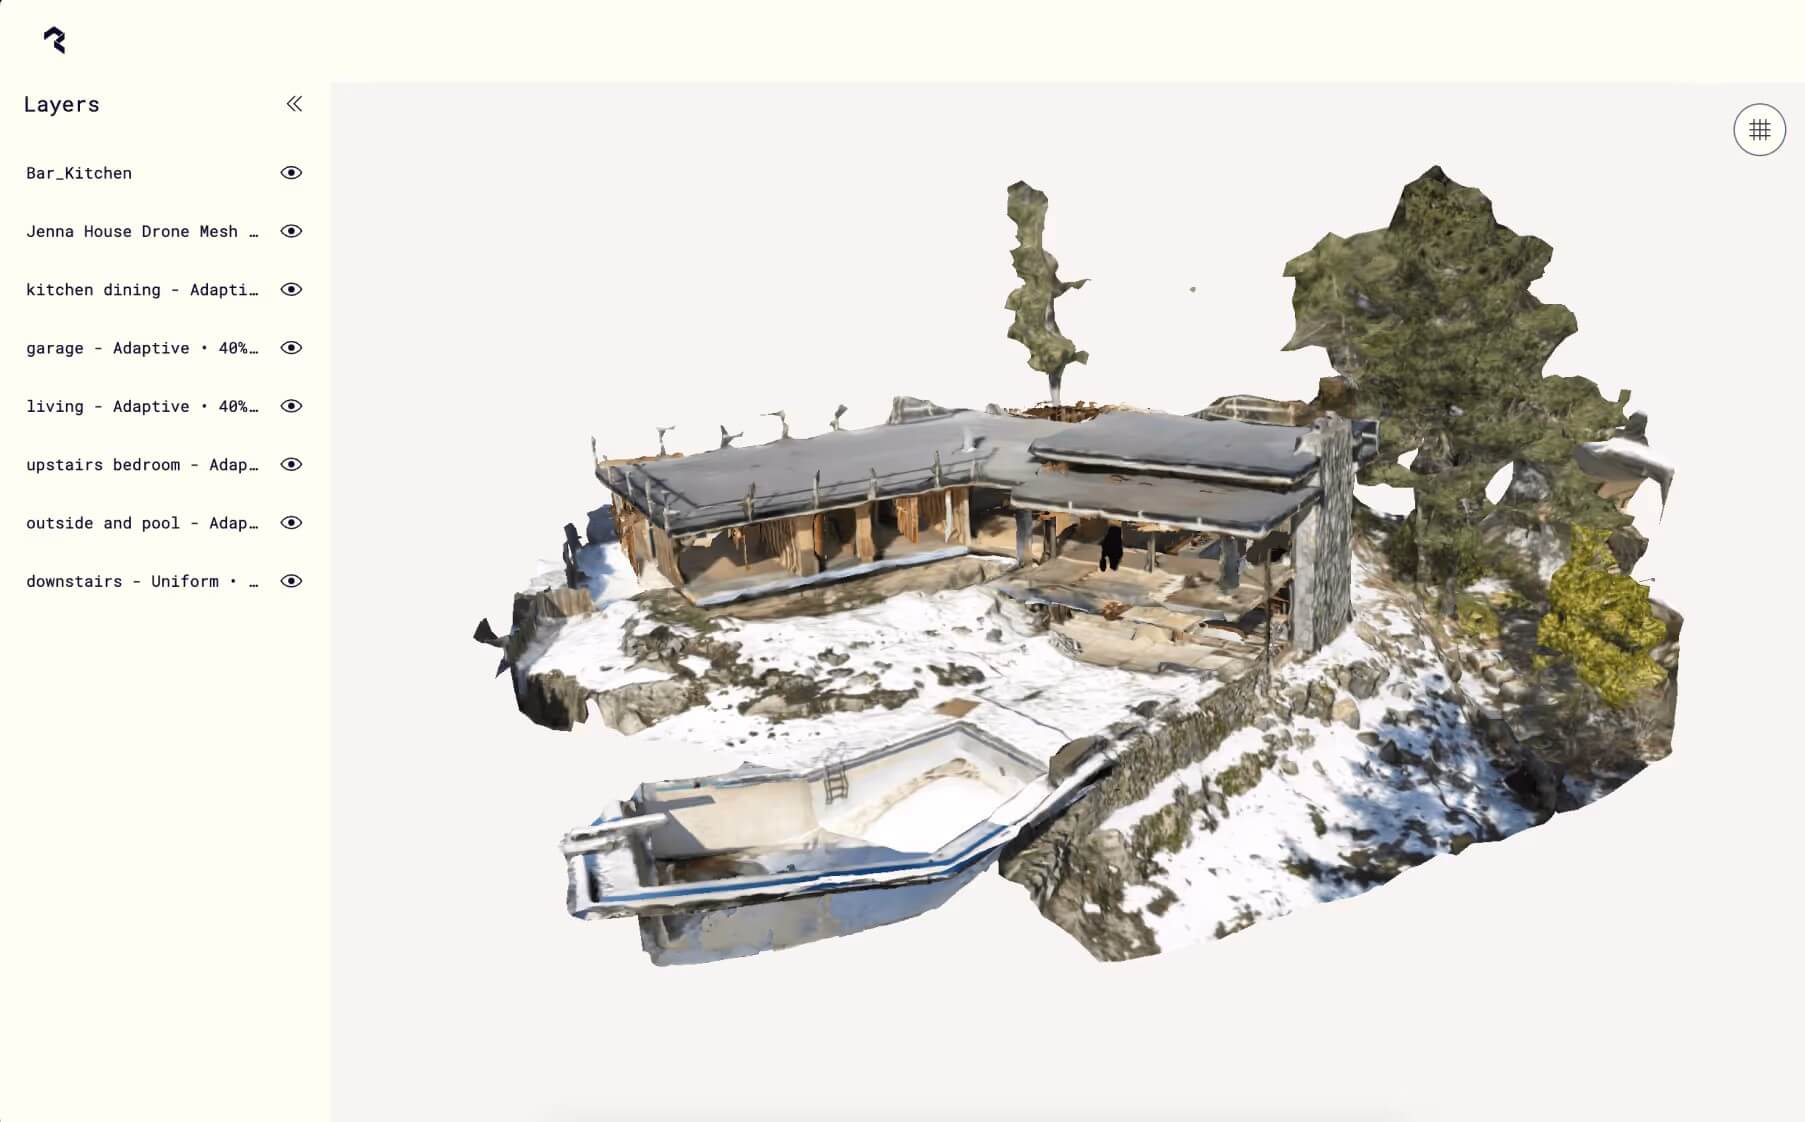
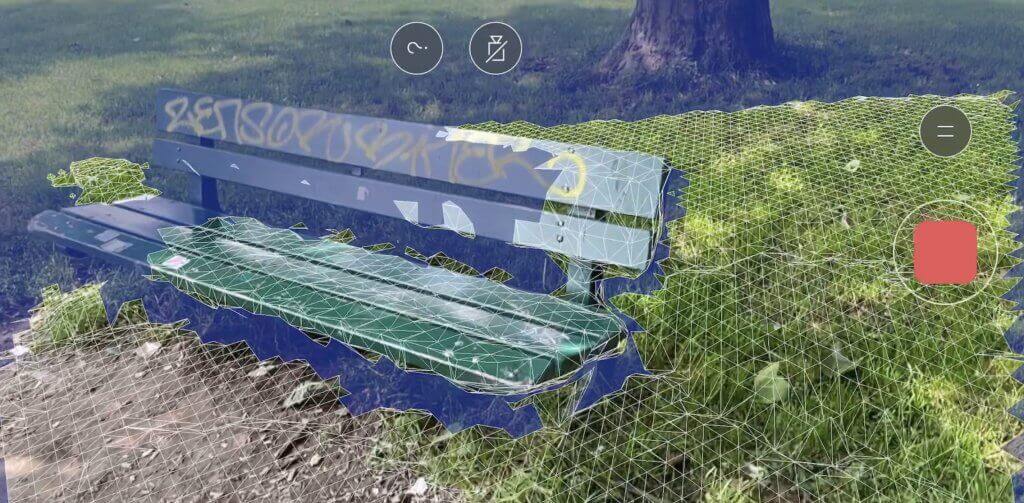
Figure 2: Preview scan of a site. The resolution is enough for a quick overview of the main features of the site and the structure, but not for examining specific construction details. Source: https://poly.cam/spatial-capture.
2. Fast spatial context with real-world scale
The next class of tool is LiDAR-based and produces a point cloud rather than a textured mesh. Point clouds are less pretty to look at, but they carry direct depth measurements and are what scan-to-BIM, CAD and dimensional-analysis workflows actually consume.
MAVO 3D
App:MAVO 3Dby MadVoxel
Device:iPhone 12 Pro / Pro Max or any newer Pro-line iPhone, or an iPad Pro from 2020 onwards. LiDAR is required, iOS only
Price:free tier with scan and export limits, plus paid subscriptions for unlimited use and advanced features
Processing:entirely on-device. No cloud or internet connection required
Best for:fast spatial context and real-world scale. Good for understanding as-built dimensions, for planning, and as a base for floor-plan creation and BIM workflows
An interesting alternative to the mesh-producing apps above is MAVO 3D by MadVoxel. Even though its scanner doesn't produce a textured 3D mesh yet, it's a highly efficient solution if your downstream workflow can consume a point cloud directly. Given its AEC positioning, one of its biggest advantages is the ability to scan large objects and building-scale spaces at high precision across multiple rooms in a single continuous session.
How it works.MAVO 3D drives the LiDAR sensor on a Pro-line iPhone or iPad Pro alongside a SLAM-based positioning algorithm. Point clouds are registered and pre-filtered live as you scan; drift correction and noise filtering then run on the device after capture.
What you get.A true-to-scale point cloud at up to 1 mm point density, exported directly into the formats most scan-to-BIM tools already consume, with dedicated post-scan optimisation pipelines to reduce drift.
Limitations.MAVO 3D produces point clouds at the moment, with mesh formats planned in a future release. If your downstream tool wants something you can navigate visually as an.obj, this isn't it yet. iOS only; you need a Pro-line iPhone or an iPad Pro with LiDAR.
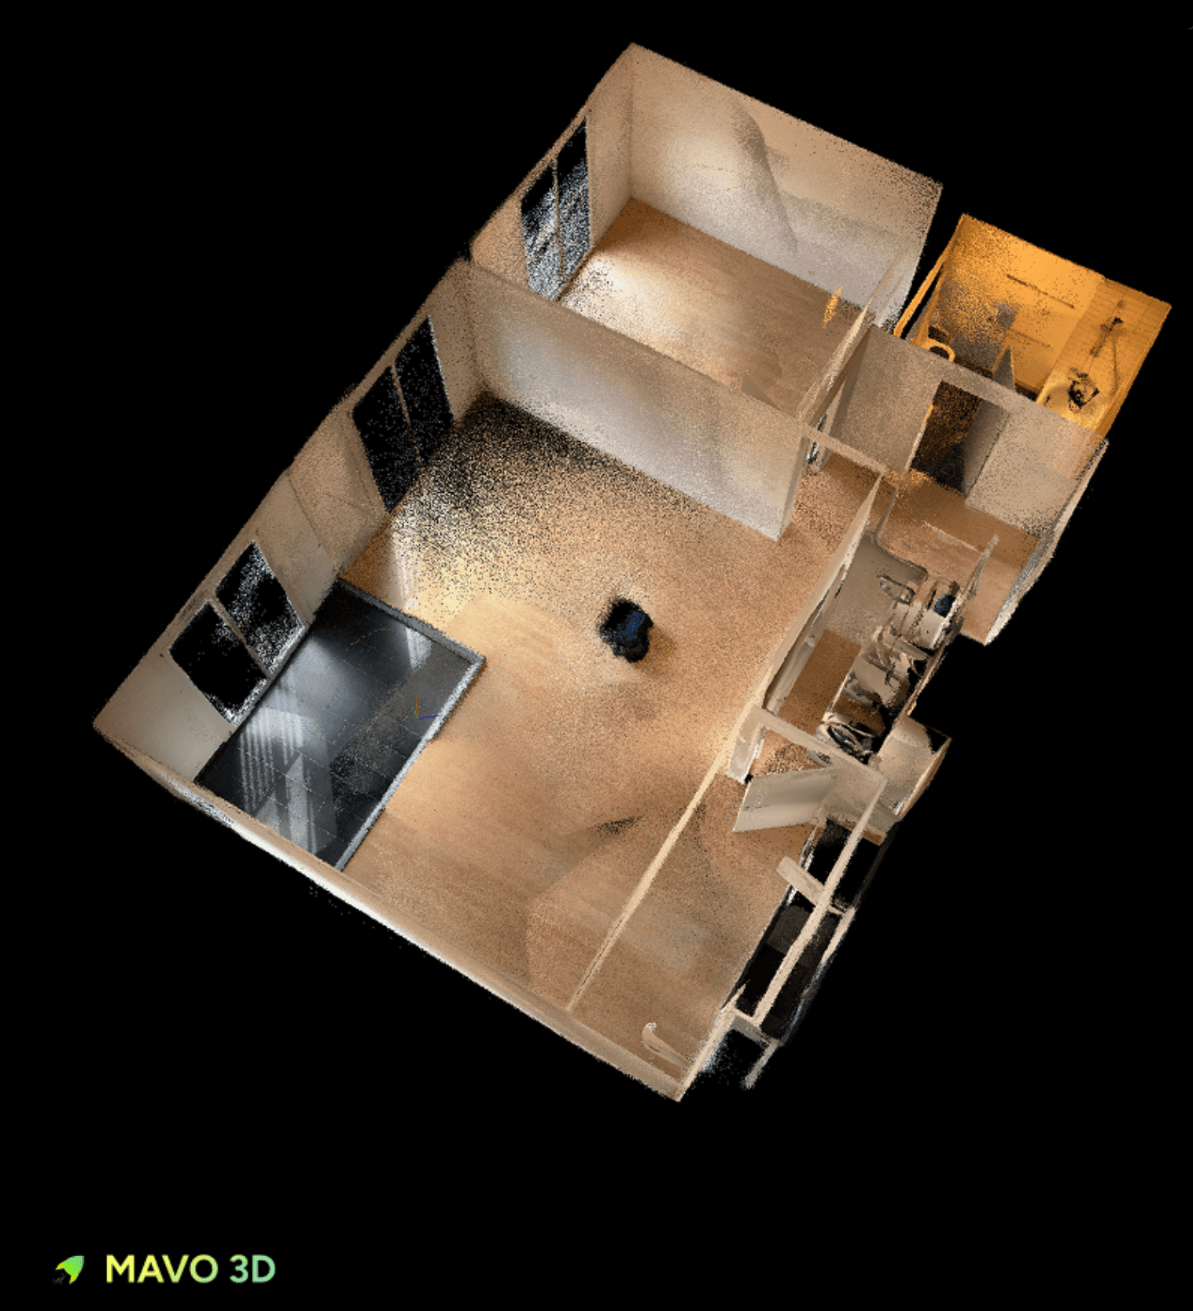
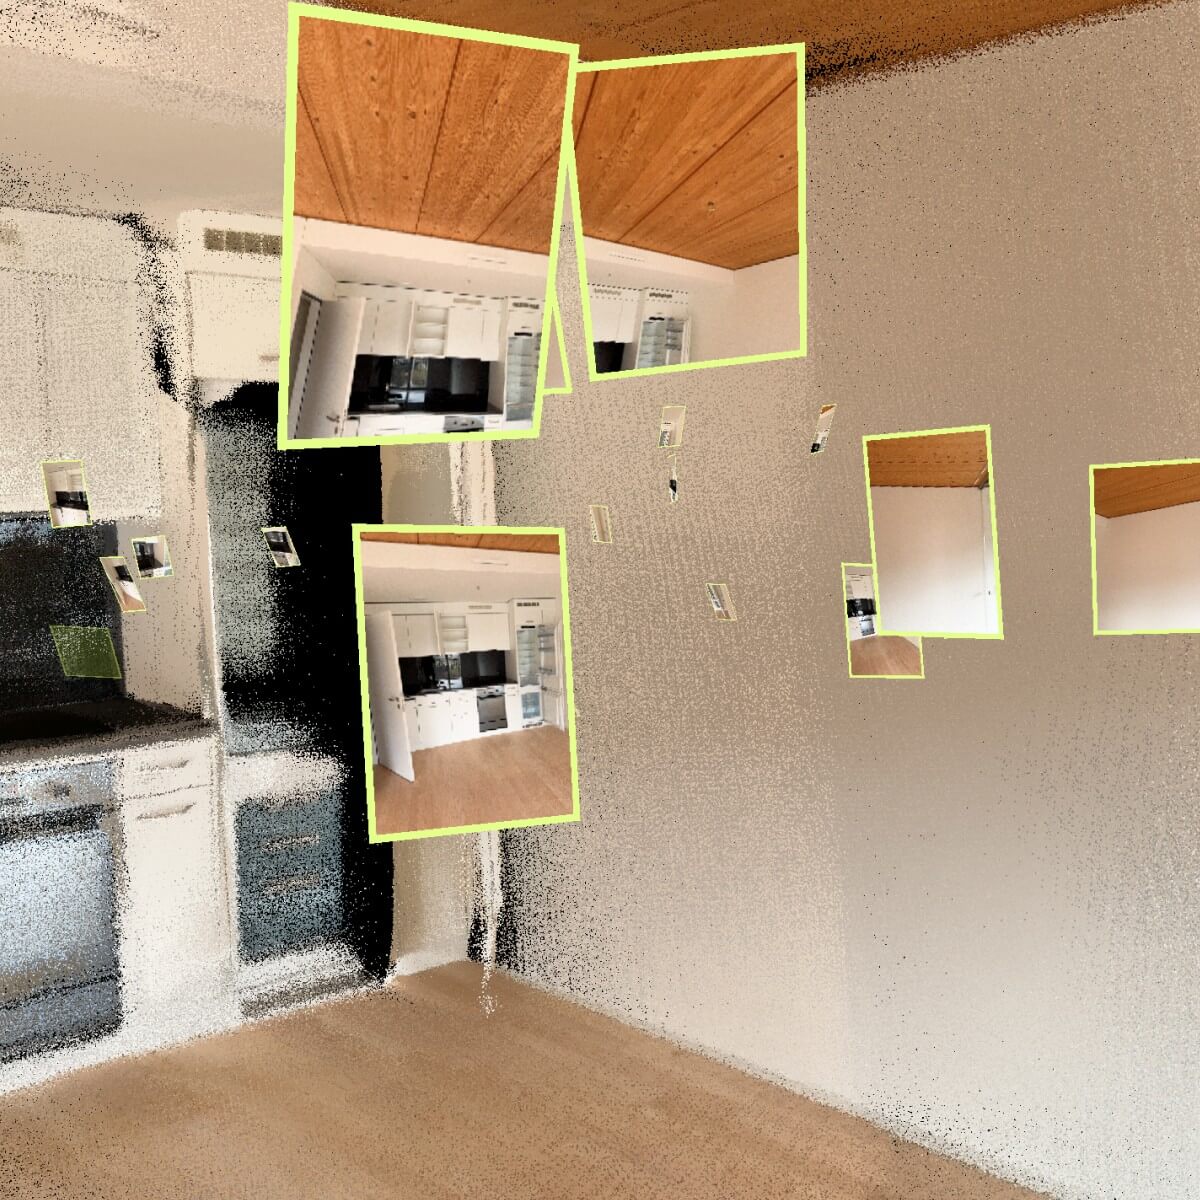
Figure 3: Mavo captures a point cloud rather than building a mesh (a feature planned for a future release). The preview can display the original captures alongside the point cloud, adding a visual layer to the 3D data. Source: MadVoxel.
Figure 4: Point cloud scans usually contain fewer artefacts than mesh models, because less software processing is involved. Source: MadVoxel.
3. High-detail asset with workstation processing
The third category offloads processing from the phone to a laptop or workstation. That's where the extra visual detail and geometric accuracy come from, at the cost of more preparation time and a more experienced operator.
RealityScan (desktop)
App:RealityScan(desktop)
Device:any camera or drone for capture (a dedicated camera typically produces better visual detail than a phone's LiDAR sensor for a single high-detail target), plus a Windows PC or workstation for processing. A LiDAR-equipped phone can also be used for capture where the geometric anchor helps
Price:free for individuals and small businesses
Processing:minutes on-site, then anywhere from tens of minutes to several hours on the desktop depending on dataset size and hardware
Output:textured 3D mesh
Best for:a single piece of equipment, a technical room, or any asset you'll consult later where the extra visual and geometric fidelity is worth the setup effort
How it works.Capture photos with any device, making sure the dataset is large enough and the images overlap sufficiently. RealityScan mobile has an AR mode that helps you check coverage as you shoot. Back on the PC, the desktop app processes the images with full control over alignment, mesh creation and scaling.
What you get.Sharp textures, clean geometry and accurate real-world scale. This is roughly the highest quality you can get without a dedicated laser scanner.
Limitations.Not a "walk and scan" workflow. It requires deliberate capture of a defined target and some experience with photogrammetry. You'll also need a reasonably capable PC and a RealityScan licence.
Best practices for scanning room interiors
As scanning apps mature and phones gain compute, the bar for a usable scan keeps dropping. Most apps now manage white balance, exposure, ISO and focal length automatically, and RealityScan's guided AR mode even flags areas that need more coverage. Those features help a lot, but a few habits still separate a clean scan from a salvage job.
1. Pre-scan preparation: set the stage
Most scanning failures aren't caused by bad hardware or poor technique. They're caused by a poorly prepared environment. A clean, well-lit scene gives the software clean surfaces to track.
Lighting.Soft, even, diffuse light across the whole room is what you want, especially for photogrammetry. Turn on all interior lights; close blinds if direct sunlight is streaming in. Strong directional light creates hard shadows that confuse the algorithm, and "golden hour" light produces glare.
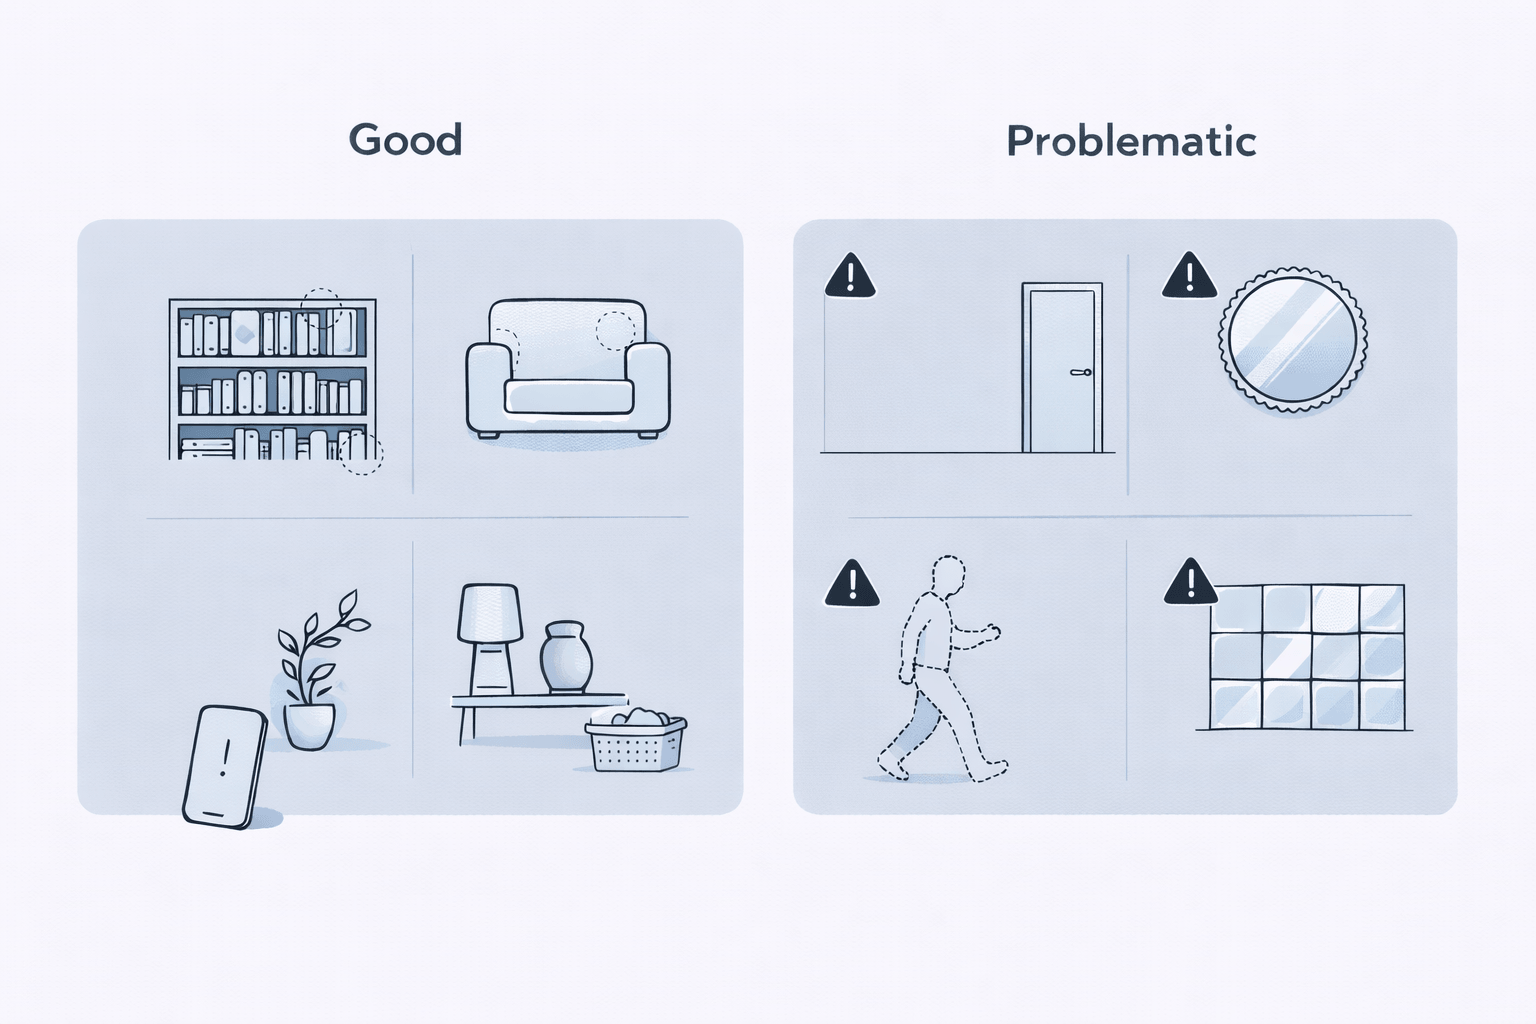
Clutter.Clear away small decorative items, loose papers, anything blocking the floor-to-wall intersection. If the app can't see those edges, it can't map the room boundaries cleanly. A clearer room also means less geometry to process and more space for you to move around.
Reflective surfaces.Mirrors, glass (windows, tabletops, glass decorations) and high-gloss floors are the natural enemies of 3D scanning. They bounce light and reflect their surroundings, creating distortions or holes in the mesh.
Tip: if you need to scan glass or a mirror, cover it or stick a crisscross of painter's tape across it. For polished floors, drop a matte rug or a few towels onto the glossy areas so the app has something textured to track.
Scene variables.Doors, windows, chairs and rugs — set them to the state you want capturedbeforeyou start. Opening a door or moving a chair mid-scan will corrupt the capture.
Have a plan.When tackling a large or intricate layout, mentally divide the space into smaller, manageable zones. Treat each zone as an individual space, capturing all its necessary details, and then link them together with a broader "master" pass. This forces you to be thorough in every corner, and it creates a built-in failsafe: if the space is too complex to process in one go, you can still try to process the smaller zones as standalone models.
Measure.Photogrammetry is surprisingly accurate, but always take manual measurements of a few key distances to verify and calibrate your model's scale. Measure distinct 3D objects or overall distances (a desk, a doorframe, wall-to-wall) rather than flat textures — physical edges are much easier to target in the final mesh.
2. Movement and technique
The goal of the capture is to produce a set of frames that overlap enough and that cover every surface you want in the model. Rushing is the number-one cause of LiDAR drift (where the model warps or curves) and incomplete meshes.
Move your body, not the phone.Hold the device steadily. When you need to turn or change direction, rotate your whole body rather than panning the phone with your wrists. A steady grip reduces motion blur and improves tracking.
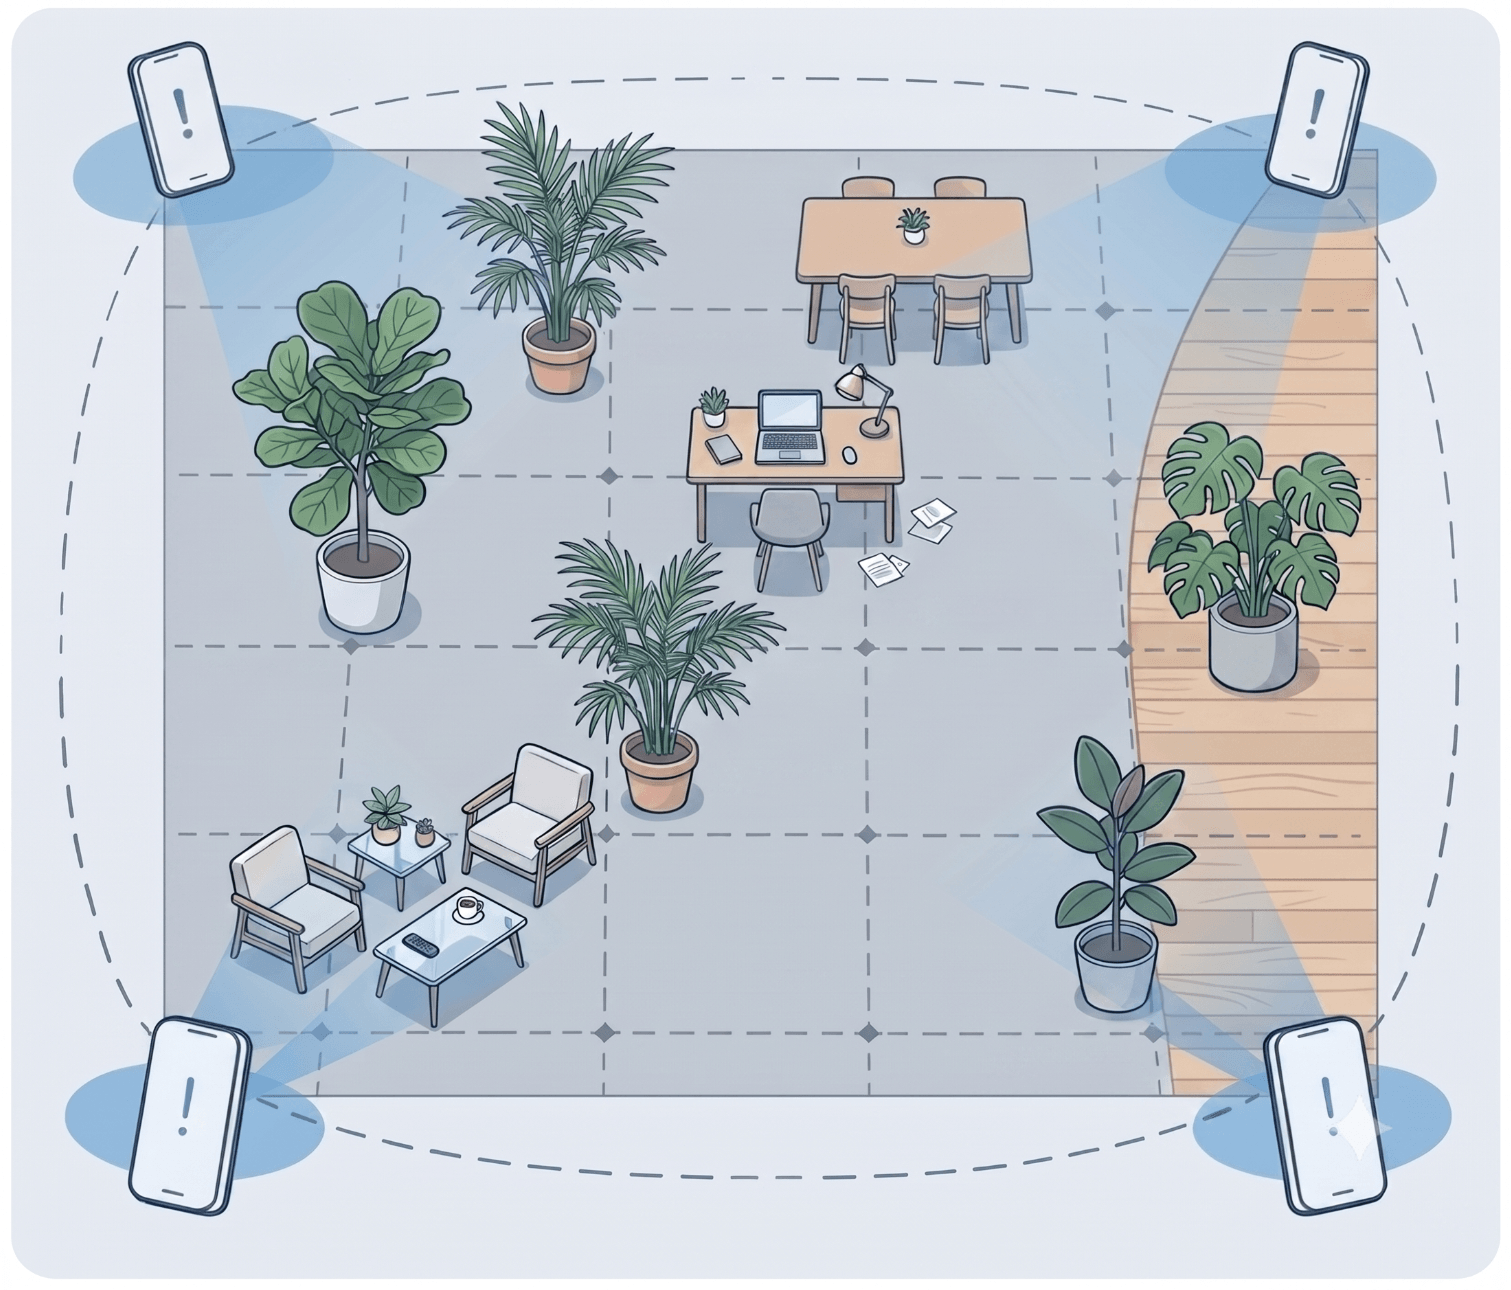
Walk the perimeter and the diagonals.Start at the entrance. Slowly walk the perimeter in one direction, angling the camera inward toward the centre of the room. Return to the entrance, then take a second pass in an "S" shape across the space, capturing both left and right sides. It helps to imagine you're capturing an object placed at the centre of the room, not the room itself.
A common mistake is standing in the middle of the room and turning on the spot. That produces a great panorama but it gives the algorithm no parallax data, so the geometry doesn't reconstruct. You have towalkthrough the space.
Figure 6: Visualisation of the correct method — scan from the perimeter towards the centre rather than turning on the spot in the middle of the room. Source: AI generated.
Capture all angles.Eye level isn't enough. Tilt the device up to catch where the ceiling meets the wall; crouch to catch the underside of tables, cabinets and the area behind furniture.
For a photogrammetry algorithm to pinpoint an object in 3D space, it relies on parallax — seeing the same point from multiple distinct angles. To get that, combine at least two physical movements between every shot. Think of it as pairing actions:step + turn, orcrouch + tilt. If you only execute one movement — for instance, lifting the camera straight up without changing the angle — the visual difference between frames won't be big enough for the software to calculate depth.
Pace yourself.Move at a slow, deliberate pace. Move too fast and the app loses tracking; worse, the lower light common to interiors lengthens exposure times and introduces blur.
3. Device setup
Most apps can scan offline, but the experience is better with an internet connection — AR features and partial processing depend on it. Keep the device well charged (or on a power bank), free up enough storage and enable "Do Not Disturb" to prevent interruptions mid-scan.
For bigger projects, it's worth investing in a LiDAR-equipped phone, and a rig, handle or selfie stick will make holding the device for an hour at a time more comfortable.
4. App-specific strategies
The rules above are general. A couple of tactics differ depending on whether you're using a photogrammetry app or a LiDAR-assisted one.
For photogrammetry apps (RealityScan, KIRI Engine, Polycam in photogrammetry mode):
Overlap is mandatory.Photogrammetry needs the software to find common feature points between images. Every photo should overlap the previous one by 60–80%.
The three-height rule.For complex objects within the room — an armchair, a kitchen island, a piece of technical equipment — take overlapping photos in continuous orbits at three different heights: high looking down, eye-level straight on, and low looking up.
Don't turn on the spot.No parallax means no depth. Walk through the space.
For LiDAR-assisted apps (Scaniverse, Polycam in space/LiDAR mode):
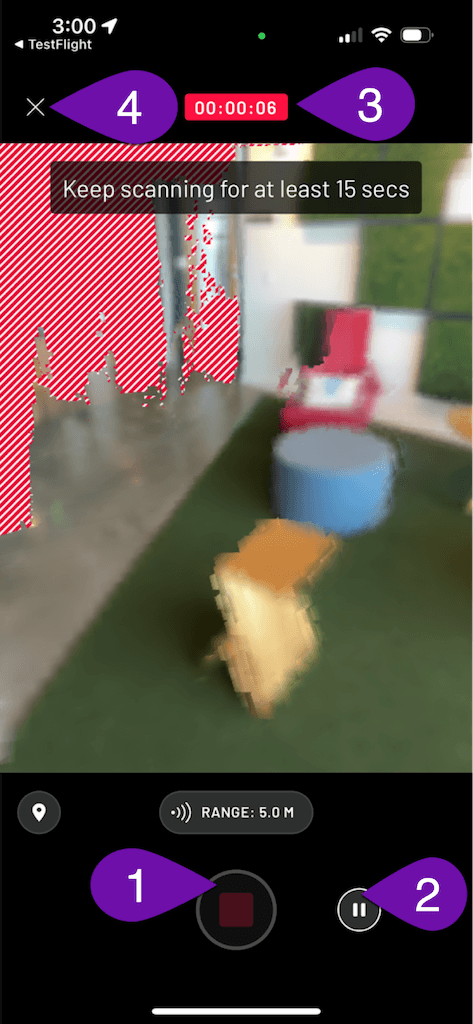
The AR overlay (grid or striped mesh) shows what's already been captured. Treat the space like a colouring book — keep moving and pointing the camera until the grid fills in or turns white.
If you're using Polycam to generate a 2D floor plan, wait for the white outline to appear at the base of a wall before moving on. If the line doesn't snap into place, scan that section again from a slightly different angle.
Some apps offer a live preview of the scanned area. Once a scan is good, the file is just the start: in an FM context it needs to land somewhere the team will actually use it. Pairing the model with the asset and space records in a CAFM/BIM system (ioFM, for example) turns a one-off capture into something maintenance can consult next week.